The Javascript API to Access a User's Local Files
📣 Sponsor
Historically, when working with frontend Javascript, it has not been possible to write or edit files on a user's computer. The justification around this was that it was more secure to prevent direct access to a user's file from the internet.
The new File System API changes that, and creates a secure way for us to change, edit and add files on a user's computer. That means we can finally write to a user's computer from a frontend Javascript file, as long as they give us permission.
How does it work?
There are three key functions we can use with the file systems API:
- window.showSaveFilePicker - which allows us to save a file to a users computer, which we then have read/write access to.
- window.showOpenFilePicker - which allows us to open an existing file on a users computer, which we can then read/write to.
- window.showDirectoryPicker - which gives us access to a directory, which we can then read/write to.
These are all async compatible functions, so we can wait for a user's response to each before proceeding. If they respond by giving access via the browsers dialog boxes, then we can use the response to write directly to the users disc.
An Example using showSaveFilePicker
Let's look at an example. Below, we have a button which when the user clicks, will open a save file dialog. This dialog has a default suggested file name of 'My First File.txt'.
let saveFile;
document.getElementById('someButton').addEventListener('click', async () => {
    try {
        saveFile = await window.showSaveFilePicker({
            suggestedName: 'My First File.txt'
        });
        const file = await saveFile.getFile();
        const contents = await file.text();
    } catch(e) {
        console.log(e);
    }
});
Using await saveFile.getFile(), we can get the file after it is created. Then, we can get its current contents using file.text(). Of course, since this file was just created, it will be empty.
Since we have our file, if it exists, saved in the saveFile variable, we can access it elsewhere. For example, we may use a textarea to update the file's content:
document.getElementById('add-text').addEventListener('keyup', async(e) => {
    if(typeof saveFile !== "undefined") {
        if ((await saveFile.queryPermission()) === 'granted') {
            const writable = await saveFile.createWritable();
            await writable.write(document.getElementById('add-text').value);
            await writable.close();
        }
    }
});
To summarise what we've done here:
- First, we check if saveFile is defined.
- Then, we check if permission has been 'granted' to this file.
- Then we write the value of the textarea to the file using
writable.write(). - Finally, we use
writable.close()to end our writing.
With showOpenFilePicker instead
Sometimes, you don't want to save a file - you want to open one that exists already. The primary purpose of these functions is to request user permission to get access to their files. As such, showOpenFilePicker has similar functionality to showSaveFilePicker.
If you need to open a file rather than save it, you can replace the save function with showOpenFilePicker to allow users to open existing files.
A Save File Demo
Below is a demo of what we've described so far. Click the button to create a file, and then type into the textarea. If you check the file on your computer, you'll see it has been updated.
Note, at the time of writing this, this demo will only work in the latest versions of Chrome and Edge.
Once the file is created, as you type in this textarea, it will automatically save to your disc.
An example with showDirectoryPicker
Let's look at another example, this time with directories. In this example, a user will select a directory.
let directory;
document.getElementById('addToFolder').addEventListener('click', async () => {
    try {
        directory = await window.showDirectoryPicker({
            startIn: 'desktop'
        });

        for await (const entry of directory.values()) {
            let newEl = document.createElement('div');
            newEl.innerHTML = `<strong>${entry.name}</strong> - ${entry.kind}`;
            document.getElementById('folder-info').append(newEl);
        }
    } catch(e) {
        console.log(e);
    }
});
The above will allow the user to select a directory, which we will then have access to. We will then show a list of all the files within that folder using the for loop we've defined above.
Creating Files and Folders
Now with access to this directory, we can create a file or directory using either getDirectoryHandle() or getFileHandle():
// Creates a file
let newFile = directory.getFileHandle('newFile.txt', { create: true });
// Creates a directory
let newFile = directory.getDirectoryHandle('myNewDirectory');
We can also delete files and directories from directories we have access to. To do that, we simply do:
// Deletes a folder, recursively (i.e. it will delete all within it as well)
directory.removeEntry('Some Directory', { recursive: true });
// Deletes a file
directory.removeEntry('SomeFile.html');
A Directory Access Demo
When you click the button below, it will list all files and folders within your selected directory. So expect a lot of rows if you have a lot of files.
Note, again, this will only work in the latest versions of Edge and Chrome.
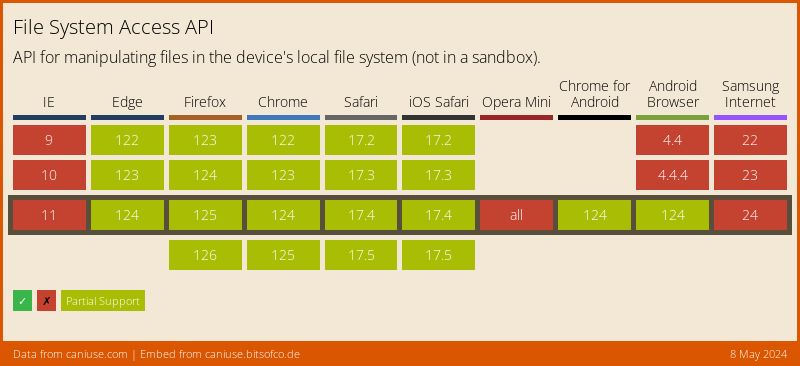
Support
Since this is a new piece of technology, support varies from browser to browser. For Blink based browsers, support is quite broad:
Conclusion
The File Access API is a game changer. It allows us to have pure frontend web applications alter and edit files, which opens up all sorts of avenues for new applications.
We hope you've enjoyed this article. See below for some useful links:
More Tips and Tricks for Javascript
- How does the Javascript logical OR (||) operator work?
- Asynchronous Operations in Javascript
- Javascript Array Concat Method
- How to fix 'Uncaught SyntaxError: Cannot use import statement outside a module'
- How to Change CSS with Javascript
- Javascript on Click Confetti Effect
- How to Auto Generate Images with Node.JS and Canvas
- An Introduction to Javascript
- Javascript Arrays - How to Remove Duplicate Elements
- Creating 3d Animated Gradient Effects with Javascript and WebGL